
Solus Linux (and Windows) on Dell XPS 13 – 9360 Kaby Lake
Time to put Linux on my XPS 13. Pick a distro, any distro. Historically I'm an Arch Linux user and what is not to like about a rolling distribution with…
Time to put Linux on my XPS 13. Pick a distro, any distro. Historically I'm an Arch Linux user and what is not to like about a rolling distribution with…

New laptop time! My Inspiron 13 (7000 2-in-1) was a nice laptop. It wasn't the lightest but it was light enough. It was a good size. After adding an SSD…
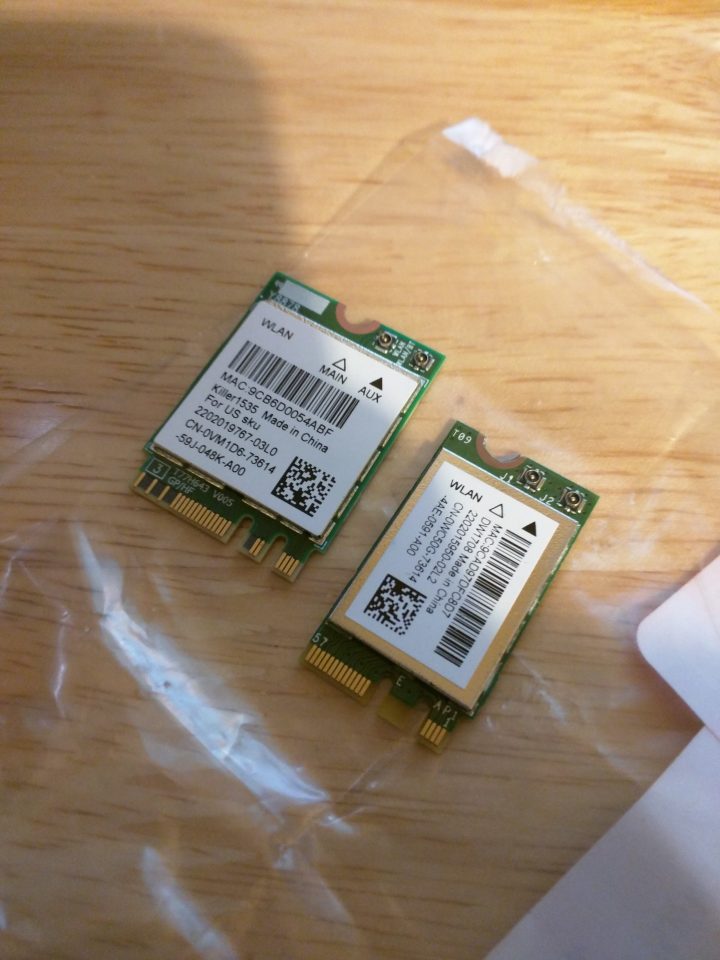
I'm unhappy with my wireless performance on my laptop so I decided to upgrade. If you decide to do this it is at your own risk, I'm not recommending it, just…